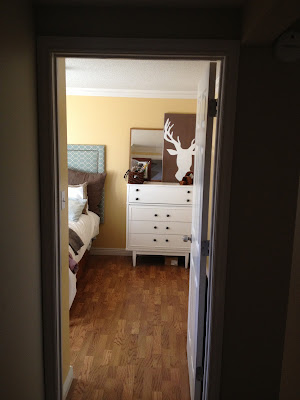
After hearing a few grumblings from handsome boyfriend that the room upstairs (the one that he gets ready for work in everyday) was a bit too "girly" for his liking, I decided that a little deer art may be right up his alley. I mean, really, deer and antlers and faux animal heads are all the rage now, aren't they?! How could I go wrong?
I found my inspiration on Pinterest (surprise, surprise). You may find the link to the original blog post handy - DIY Deer Head Silhouette: Wall Art Decor {How to Re-purpose Old Canvas}.
 I happened to have a large piece of canvas art in the basement storage closet that was collecting dust, so I opted to re-purpose it into my own, home-made painting.The art I had was similar to the piece (left) and just didn't fit my taste or our house decor anymore.
 <<------------------------------------------
After purchasing a $2 piece of unbleached muslin fabric at Jo-Ann fabric, I used my handy staple gun to affix the fabric over the pre-existing painted canvas artwork (make sure you don't pull the fabric too taut or you may see puckering in your fabric).
I didn't use the projector trick to get the deer on to the canvas like the author of the blog did, but I opted to take my own path.

Instead I found a deer silhouette image online that was free for download.
 I then used a neat (and also free) web site called BlockPosters.com to upload my deer silhouette image and increase the size of it for my canvas (basically it asks you how many pieces of 8 1/2 x 11 paper you want to use to blow up your new, larger image).
 From there you able to download your larger image and each section of the image can be printed on your own printer paper. Once you tape each piece of paper together you get one large deer head silhouette! (It is much easier than I just made it sound - try it!).


Once I had my large deer head silhouette all taped together, I cut the excess paper off around the deer head so that I could pencil / stencil it onto my muslin fabric. I did a bit of free hand because I wanted my deer slightly larger than what I had printed, but it all turned out fine.
Then came the paint. I carefully hand painted the inside of my deer silhouette (white paint), let that dry, and then tackled the outside of the silhouette (brown paint - which I knew would easily cover up any white paint errors). This was a bit time consuming, but it was also kind of relaxing to do.
In the end, my deer came out without a few minor flaws, but it was a vast improvement from the non-matching, unused canvas that was taking up space in our basement. Handsome boyfriend was pleasantly surprised and complimentary of the new artwork and although the room is still generally "girly", the deer head art provides a little bit of a masculine touch to the upstairs guest bedroom.


Now I just need to decorate / stage the rest of the dresser top, but for now the deer painting is on display!


Thanks for your advice on that site where you can enlarge pictures - could be handy!
ReplyDeleteI was just looking for this picture, and fighting with my printer to enlarge it. Thanks for the suggestion on the site! I'm using mine to make a glitter deer head canvas to try to "girly" up my boyfriends manly guest bedroom!
ReplyDeleteThank you for posting this! I used all your advice and made a white deer head picture for my son's room. It didn't cost me anything since I also had an old picture that I was about to put on Craigslist and some leftover paint! You are brilliant!!
ReplyDeleteReally amazing All post picture ans article. i like your all post Keep it Up.
ReplyDeleteDeer Scent Reviews
Thank you very much for keep this information. Backcountry hunting
ReplyDeleteI really love the arts/design of your website. I am so thrilled I found your website, I really found you by mistake, while I was browsing on Yahoo for something I found another one Sneha arts like you, Anyhow I am here now and would just like to say thanks a lot for a tremendous post blog and check these Sneha studio , also look like your website on arts.
ReplyDeleteI love how you repurposed an old canvas for this deer head wall art.
ReplyDelete